
این راهنما شما را در نصب مادهای Steam Workshop روی سرور Project Zomboid میزبانی شده با Legion Hosting راهنمایی میکند. این راهنما فرمتهای ماد B42 و B41، ابزار Mod Organizer Legion Hosting، نکات سازگاری برای بستههای ماد بزرگ و نحوه بازیابی از خرابیهای رایج جهان مرتبط با ماد را پوشش میدهد.
پیشنیازها
- یک سرور Project Zomboid فعال با Legion Hosting، قابل دسترسی در gpanel.legionhosting.net
- سرور شما باید قبل از ویرایش تنظیمات ماد آفلاین باشد — ابتدا آن را در GPanel متوقف کنید
- شناسه Steam Workshop و شناسه ماد برای هر مادی که میخواهید نصب کنید (در صفحه Steam Workshop هر ماد یافت میشود)
- یک نسخه پشتیبان از سیو فعلی جهان شما (به شدت توصیه میشود — هشدار بالا را ببینید)
مرحله ۱ — یافتن Workshop ID و Mod ID برای هر ماد
هر مادی که میخواهید نصب کنید به دو شناسه جداگانه نیاز دارد:
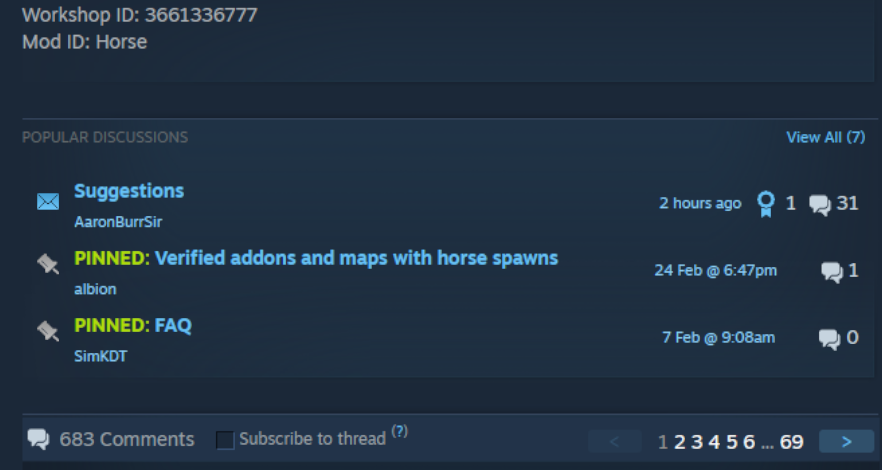
- Workshop ID — شناسه عددی در آدرس Steam Workshop، مثلاً
https://steamcommunity.com/sharedfiles/filedetails/?id=2392987841 - Mod ID — شناسه داخلی تعریف شده توسط سازنده ماد، که در توضیحات ماد در صفحه Workshop یافت میشود، معمولاً به صورت "Mod ID:" فهرست شده یا داخل فایل
mod.infoماد قرار دارد
هر دو شناسه را برای هر ماد قبل از ادامه یادداشت کنید. یک آیتم Workshop گاهی حاوی چندین زیر-ماد است که هر کدام شناسه ماد مخصوص به خود را دارند.
مرحله ۲ — استفاده از Mod Organizer Legion Hosting (توصیه شده)
آسانترین روش برای ساخت لیست ماد شما، Zomboid Mod Organizer Legion Hosting است. این ابزار به شما امکان جستجو در Workshop، افزودن ماد با آدرس URL یا شناسه و تولید خودکار خطوط پیکربندی با فرمت صحیح را میدهد که باید در GPanel جایگذاری کنید.
- به legionhosting.net/zomboid-mod-organizer.php بروید.
- مادها را با نام جستجو کنید یا آدرس Steam Workshop را در کادر جستجو جایگذاری کنید.
- هر ماد را با استفاده از دکمه Add به لیست خود اضافه کنید.
- پس از تکمیل لیست، روی Generate Config کلیک کنید. ابزار خطوط آماده استفاده
WorkshopItemsوModsرا با فرمت مناسب نسخه بیلد سرور شما تولید میکند. - خطوط تولید شده را کپی کنید و به مرحله ۴ بروید تا آنها را در تنظیمات سرور جایگذاری کنید.
اگر ترجیح میدهید شناسهها را به صورت دستی وارد کنید، با مرحله ۳ ادامه دهید تا آنها را برای نسخه بیلد خود به درستی فرمت کنید.
مرحله ۳ — فرمت صحیح لیست ماد
WorkshopItems (یکسان برای همه بیلدها)
خط WorkshopItems از نقطهویرگول برای جداسازی Workshop ID ها استفاده میکند. این فرمت برای هر دو B41 و B42 یکسان است:
WorkshopItems line
WorkshopItems=2392987841;1550458773;2786383654
Mods — فرمت Build 42 (B42)
B42 از پیشوند بکاسلش (\) قبل از هر Mod ID استفاده میکند:
Mods line (B42)
Mods=\ModID1;\ModID2;
فرمت DLMP (B42)
برخی پیکربندیها از فرمت DLMP استفاده میکنند که Workshop ID ها و Mod ID ها را با بکاسلش در یک فیلد واحد ترکیب میکند:
DLMP format
2392987841\ModID1;1550458773\ModID2;2786383654\ModID3;
Mods باید با پیشوند بکاسلش باشند: \modID. از اسلش رو به جلو، ویرگول یا فقط Mod ID بدون پیشوند بکاسلش استفاده نکنید.
Mods — فرمت Build 41 (B41)
B41 از Mod ID های ساده جداشده با نقطهویرگول بدون پیشوند بکاسلش استفاده میکند:
Mods line (B41)
Mods=ModID1;ModID2;ModID3
Mods خود را برای استفاده از پیشوند بکاسلش (\ModID) مجدداً فرمت کنید. فرمت قدیمی B41 شما مادها را روی سرور B42 به درستی بارگذاری نخواهد کرد.
مرحله ۴ — اعمال لیست ماد در فایل تنظیمات سرور
- وارد GPanel شوید و سرور Project Zomboid خود را انتخاب کنید.
- مطمئن شوید سرور آفلاین است. در صورت نیاز آن را متوقف کنید.
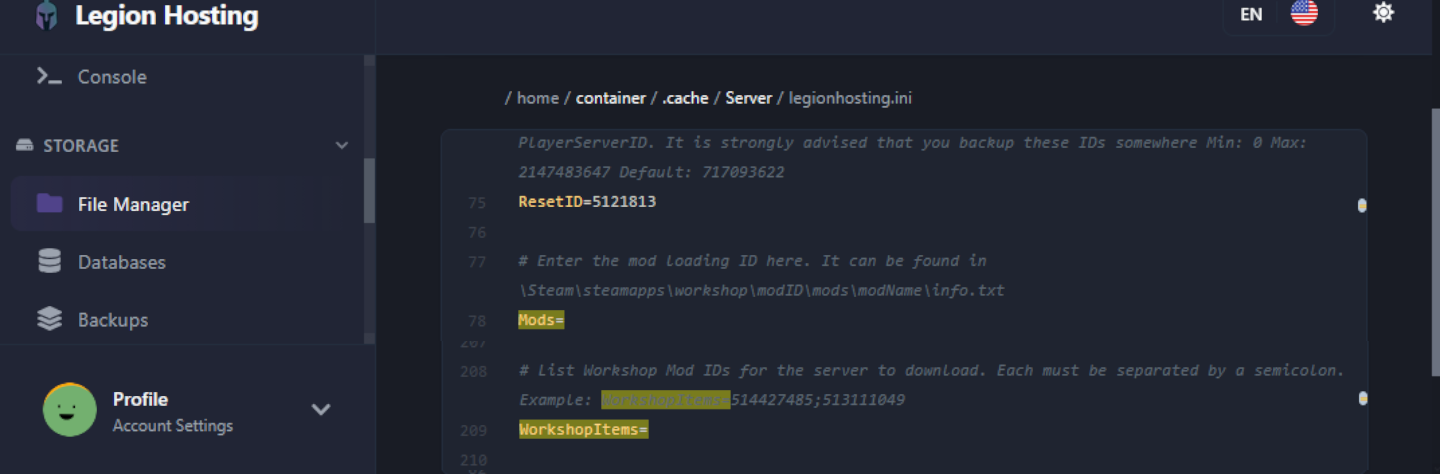
- File Manager را باز کنید و به مسیر
/.cache/server/بروید. - فایل تنظیمات سرور خود را باز کنید — نام آن
<servername>.iniاست (مثلاًservertest.ini). - خطوط
WorkshopItems=وMods=را در فایل پیدا کنید. مقادیری که در مرحله ۲ تولید یا در مرحله ۳ فرمت کردهاید را جایگذاری کنید. - فایل را ذخیره کنید.
- سرور را راهاندازی کنید. دانلود Steam Workshop به صورت خودکار هنگام راهاندازی شروع میشود.
مرحله ۵ — افزودن تدریجی مادها و آزمایش
کل لیست ماد مورد نظر خود را یکجا اضافه نکنید، بهویژه روی سرور فعال یا هنگام کار با مجموعه بزرگ. در عوض:
- بیش از ۳ تا ۵ ماد در هر بار اضافه نکنید.
- سرور را راهاندازی کنید و تأیید کنید که به وضعیت در حال اجرا میرسد و میتوانید متصل شوید و بازی کنید.
- کنسول GPanel را برای هرگونه پیام خطا یا stack trace قبل از افزودن دسته بعدی بررسی کنید.
- تکرار کنید تا همه مادها بارگذاری و پایدار شوند.
این رویکرد شناسایی مادی که مشکل ایجاد میکند را بسیار آسانتر میسازد.
نصب مادهای غیر Workshop
اگر مادی دارید که در Steam Workshop نیست (به صورت پوشه یا فایل ZIP دانلود شده)، آن را از طریق SFTP به مسیر زیر در سرور آپلود کنید:
/.cache/mods/
پوشه ماد (که باید حاوی فایل mod.info باشد) را مستقیماً داخل /.cache/mods/ قرار دهید. میتوانید با استفاده از اطلاعات SFTP نمایش داده شده در GPanel در تب SFTP به این دایرکتوری دسترسی پیدا کنید. پس از آپلود، Mod ID (از فایل mod.info ماد) را به خط Mods= در پیکربندی سرور خود همانطور که در مرحله ۴ توضیح داده شد اضافه کنید. برای مادهای غیر Workshop نیازی به Workshop ID نیست.
نکته سازگاری Authentic Z
Authentic Z یکی از محبوبترین بستههای ماد Project Zomboid است، اما شامل زیر-مادهای متعددی میشود. فقط یک زیر-ماد در هر بار نصب کنید و زیر-ماد توصیه شده برای سرورهای چندنفره این است:
Authentic Z - Current
چندین زیر-ماد Authentic Z را به طور همزمان روی یک سرور فعال نکنید. اجرای بیش از یک زیر-ماد از این مجموعه باعث تداخلاتی میشود که میتواند سرور را کرش کند یا جداول لوت را خراب کند. اگر مطمئن نیستید کدام زیر-ماد فعال است، خط Mods= را در پیکربندی خود بررسی کنید و مطمئن شوید فقط Authentic Z - Current (یا تنها زیر-ماد انتخابی شما) فهرست شده است.
تأیید
پس از راهاندازی سرور با مادهای جدید، بارگذاری موفق آنها را تأیید کنید:
- در GPanel، تب Console را باز کنید و لاگ راهاندازی را مشاهده کنید. به دنبال خطوطی باشید که به بارگذاری هر ماد اشاره دارند — باید چیزی مانند
[ModLoader] Loading mod: ModIDبرای هر ماد نصب شده ببینید. - به سرور در بازی متصل شوید و منوی Mods را از منوی اصلی باز کنید (Esc → Mods). مادهای نصب شده باید در لیست ظاهر شوند.
- لاگ کنسول را برای عبارت
STACK TRACEجستجو کنید. اگر هیچکدام ظاهر نشد، سرور بدون مشکل راهاندازی شده است. اگر یکی مشاهده کردید، نام ماد ذکر شده نزدیک بالای trace را یادداشت کنید — آن ماد احتمالاً علت مشکل است. - در بازی حرکت کنید و تأیید کنید که محتوای اضافه شده توسط ماد (آیتمها، ساختمانها، زامبیها) همانطور که انتظار میرود ظاهر میشوند.
رفع مشکلات
مادها بارگذاری نمیشوند / سرور راهاندازی میشود اما مادها غیرفعال به نظر میرسند
- تأیید کنید خط
Modsاز فرمت صحیح برای بیلد شما استفاده میکند — پیشوند بکاسلش (\ModID) برای B42، Mod ID های ساده برای B41. فرمتWorkshopItemsبرای هر دو بیلد یکسان است. - تأیید کنید Mod ID در خط
Mods=دقیقاً با شناسه نمایش داده شده در توضیحات Workshop ماد یا فایلmod.infoمطابقت دارد. Mod ID ها به بزرگی و کوچکی حروف حساس هستند. - بررسی کنید که هر دو فیلد
WorkshopItemsوModsذخیره شدهاند — در GPanel از صفحه خارج شوید و برگردید تا تأیید کنید مقادیر حفظ شدهاند.
دانلود Steam Workshop ناموفق / مادها هنگام راهاندازی دانلود نمیشوند
اگر سرور راهاندازی میشود اما به نظر میرسد مادهای Workshop دانلود نمیشوند، پوشه کش Steam ممکن است خراب شده باشد. برای رفع این مشکل:
- سرور را در GPanel متوقف کنید.
- از طریق SFTP متصل شوید و به مسیر
/steamapps/workshop/بروید. - کل پوشه
workshop/(یا محتویات آن) را حذف کنید. - سرور را دوباره راهاندازی کنید. Steam همه آیتمهای Workshop را از ابتدا دوباره دانلود خواهد کرد.
WorldDictionaryException / خرابی دیکشنری جهان
اگر لاگ کنسول خطای WorldDictionaryException را نشان میدهد، دیکشنری جهان خراب شده است — این میتواند هنگام افزودن یا حذف مادهایی که آیتمها یا تایلهای جدید معرفی میکنند رخ دهد.
WorldDictionary.bin میتواند شناسه آیتمها و شناسه وسایل نقلیه را در سیو شما خراب کند. این کار را فقط در صورتی انجام دهید که سرور اصلاً راهاندازی نمیشود و گزینه دیگری ندارید. همیشه ابتدا از پوشه سیو خود نسخه پشتیبان تهیه کنید.
اگر باید تلاش برای بازیابی کنید:
- سرور را در GPanel متوقف کنید.
- از کل پوشه سیو خود از طریق SFTP یا پشتیبانهای GPanel نسخه پشتیبان تهیه کنید.
- از طریق SFTP متصل شوید و به مسیر
/.cache/saves/multiplayer/<YourWorldName>/بروید. - فایل
WorldDictionary.binرا حذف کنید. - سرور را راهاندازی کنید. Project Zomboid دیکشنری را هنگام راهاندازی مجدداً تولید خواهد کرد.
- در بازی آیتمها یا وسایل نقلیه خراب شده را بررسی کنید. اگر جهان به شدت آسیب دیده، از نسخه پشتیبانی که در مرحله ۲ ایجاد کردهاید بازیابی کنید.
سرور هنگام راهاندازی با STACK TRACE در لاگ کنسول کرش میکند
یک stack trace بلافاصله پس از راهاندازی معمولاً نشاندهنده تداخل ماد یا مادی است که با نسخه بیلد فعلی شما سازگار نیست. برای تشخیص:
- در GPanel، لاگ Console را باز کنید و عبارت
STACK TRACEرا جستجو کنید. - خطوط بالای trace را برای نام فایل ماد یا Mod ID ذکر شده بخوانید — این معمولاً ماد مشکلساز است.
- آن ماد را از هر دو خط
WorkshopItemsوModsحذف کنید، ذخیره کنید و سرور را مجدداً راهاندازی کنید. - اگر سرور پس از حذف بدون مشکل راهاندازی شد، صفحه Workshop ماد را برای آپدیت سازگار با B42 یا یادداشت تداخل شناخته شده در نظرات بررسی کنید.
همچنین میتوانید فایل کامل debug.log را از طریق SFTP در مسیر /.cache/Logs/<date>_DebugLog-server.txt باز کنید تا جزئیات بیشتری نسبت به کنسول GPanel مشاهده کنید.
سرور هنگام اتصال بازیکنان با مادهای خاص کرش میکند
اگر سرور بدون مشکل اجرا میشود اما هنگام پیوستن یک بازیکن کرش میکند، ممکن است بازیکن مادهای سمت کلاینت داشته باشد که با سرور تداخل دارند. از بازیکن بخواهید تمام مادهای محلی Project Zomboid خود را از منوی Mods در بازی غیرفعال کند و دوباره اتصال را امتحان کند. اگر کرش متوقف شد، بازیکن باید مادها را یکی یکی مجدداً فعال کند تا ماد متداخل را پیدا کند.
ماد حذف شده اما سرور همچنان سعی در بارگذاری آن دارد
اگر شناسه یک ماد را از پیکربندی حذف کردهاید اما سرور همچنان هنگام راهاندازی به آن ارجاع میدهد، ممکن است آیتم Workshop همچنان در کش باشد. پوشه آیتم Workshop مشخص را از مسیر /steamapps/workshop/content/108600/<workshopID>/ از طریق SFTP حذف کنید، سپس سرور را مجدداً راهاندازی کنید.
