This guide walks you through installing Steam Workshop mods on your Project Zomboid server hosted with Legion Hosting. It covers the B42 and B41 mod formats, the Legion Hosting Mod Organizer tool, compatibility notes for large mod packs, and how to recover from common mod-related world corruption.
Prerequisites
- An active Project Zomboid server with Legion Hosting, accessible at gpanel.legionhosting.net
- Your server must be Offline before editing mod settings — stop it in GPanel first
- The Steam Workshop ID(s) and Mod ID(s) for each mod you want to install (found on each mod's Steam Workshop page)
- A backup of your current world save (strongly recommended — see the warning above)
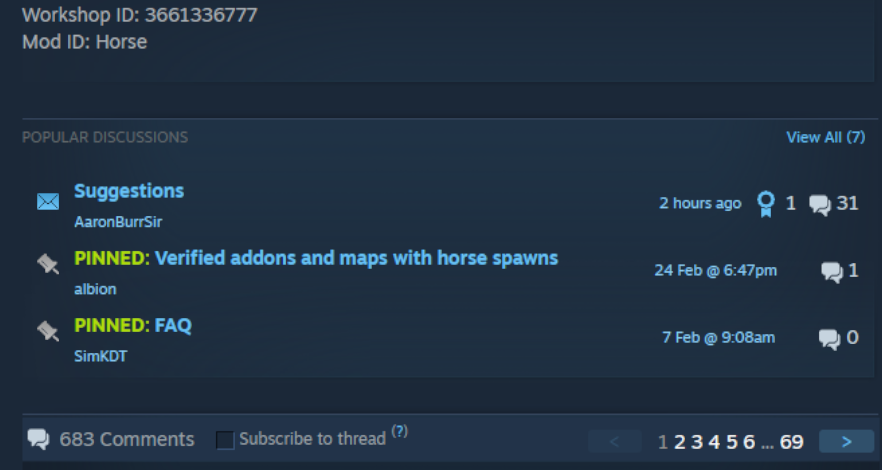
Step 1 — Find the Workshop ID and Mod ID for Each Mod
Every mod you want to install requires two separate identifiers:
- Workshop ID — the numeric ID in the Steam Workshop URL, e.g.,
https://steamcommunity.com/sharedfiles/filedetails/?id=2392987841 - Mod ID — the internal ID defined by the mod author, found in the mod's description on the Workshop page, usually listed as "Mod ID:" or inside the mod's
mod.infofile
Write down both IDs for every mod before continuing. A single Workshop item sometimes contains multiple sub-mods, each with its own Mod ID.
Step 2 — Use the Legion Hosting Mod Organizer (Recommended)
The easiest way to build your mod list is the Legion Hosting Zomboid Mod Organizer. It lets you search the Workshop, add mods by URL or ID, and automatically generates the correctly formatted configuration lines you need to paste into GPanel.
- Go to legionhosting.net/zomboid-mod-organizer.php.
- Search for mods by name or paste a Steam Workshop URL into the search box.
- Add each mod to your list using the Add button.
- Once your list is complete, click Generate Config. The tool outputs ready-to-use
WorkshopItemsandModslines formatted for your server's build version. - Copy the generated lines and proceed to Step 4 to paste them into your server settings.
If you prefer to enter the IDs manually, continue with Step 3 to format them correctly for your build version.
Step 3 — Format the Mod List Correctly
WorkshopItems (same for all builds)
The WorkshopItems line uses a semicolon to separate Workshop IDs. This format is the same for both B41 and B42:
WorkshopItems line
WorkshopItems=2392987841;1550458773;2786383654
Mods — Build 42 (B42) Format
B42 uses a backslash prefix (\) before each Mod ID:
Mods line (B42)
Mods=\ModID1;\ModID2;
DLMP Format (B42)
Some configurations use the DLMP format, which combines Workshop IDs and Mod IDs with a backslash in a single field:
DLMP format
2392987841\ModID1;1550458773\ModID2;2786383654\ModID3;
Mods entries must be prefixed with a backslash: \modID. Do not use forward slashes, commas, or just the Mod ID alone without the backslash prefix.
Mods — Build 41 (B41) Format
B41 uses plain semicolon-separated Mod IDs with no backslash prefix:
Mods line (B41)
Mods=ModID1;ModID2;ModID3
Mods line to use the backslash prefix (\ModID). Your old B41 format will not load mods correctly on a B42 server.
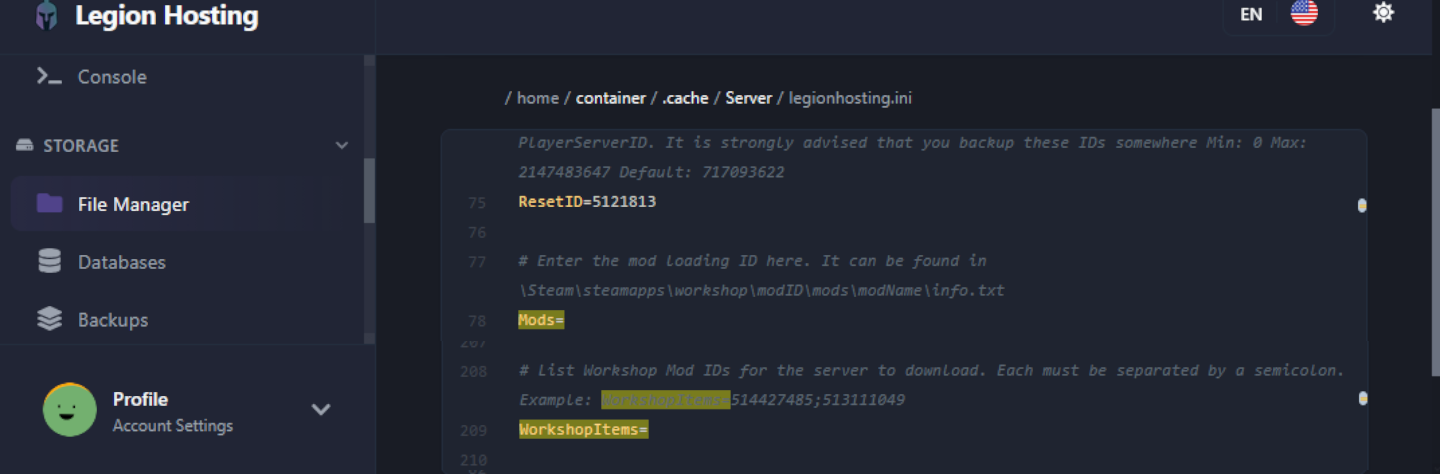
Step 4 — Apply the Mod List in Your Server Settings File
- Log in to GPanel and select your Project Zomboid server.
- Make sure the server is Offline. Stop it if needed.
- Open the File Manager and navigate to
/.cache/server/. - Open your server settings file — it is named
<servername>.ini(e.g.,servertest.ini). - Find the
WorkshopItems=andMods=lines in the file. Paste the values you generated in Step 2 or formatted in Step 3. - Save the file.
- Start the server. Steam Workshop downloads will begin automatically on startup.
Step 5 — Add Mods Gradually and Test
Do not add your entire desired mod list at once, especially on an active server or when working with a large collection. Instead:
- Add no more than 3–5 mods at a time.
- Start the server and confirm it reaches Running status and that you can connect and play.
- Check the GPanel Console for any error messages or stack traces before adding the next batch.
- Repeat until all mods are loaded and stable.
This approach makes it much easier to identify which mod causes a problem if something goes wrong.
Installing Non-Workshop Mods
If you have a mod that is not on the Steam Workshop (downloaded as a folder or ZIP file), upload it via SFTP to the following path on your server:
/.cache/mods/
Place the mod's folder (which should contain a mod.info file) directly inside /.cache/mods/. You can access this directory using the SFTP credentials shown in GPanel under the SFTP tab. After uploading, add the Mod ID (from the mod's mod.info file) to the Mods= line in your server configuration as described in Step 4. No Workshop ID is needed for non-Workshop mods.
Authentic Z Compatibility Note
Authentic Z is one of the most popular Project Zomboid mod packs, but it consists of many sub-mods. Only install one sub-mod at a time, and the recommended sub-mod for multiplayer servers is:
Authentic Z - Current
Do not enable multiple Authentic Z sub-mods simultaneously on the same server. Running more than one sub-mod from this collection causes conflicts that can crash the server or corrupt loot tables. If you are unsure which sub-mod is active, check the Mods= line in your configuration and ensure only Authentic Z - Current (or your single chosen sub-mod) is listed.
Verification
After starting the server with your new mods, confirm they loaded successfully:
- In GPanel, open the Console tab and watch the startup log. Look for lines referencing each mod being loaded — you should see something like
[ModLoader] Loading mod: ModIDfor each installed mod. - Connect to the server in-game and open the Mods menu from the main menu (Esc → Mods). Installed mods should appear in the list.
- Search the Console log for the phrase
STACK TRACE. If none appears, the server started cleanly. If you see one, note the mod mentioned near the top of the trace — that mod is the likely cause of the problem. - Walk around in-game and confirm mod-added content (items, buildings, zombies) appears as expected.
Troubleshooting
Mods are not loading / server starts but mods seem inactive
- Verify the
Modsline uses the correct format for your build — backslash prefix (\ModID) for B42, plain Mod IDs for B41. TheWorkshopItemsformat is the same for both builds. - Confirm the Mod ID in the
Mods=line exactly matches the ID shown in the mod's Workshop description ormod.infofile. Mod IDs are case-sensitive. - Check that both the
WorkshopItemsandModsfields are saved — navigate away and back in GPanel to confirm the values persisted.
Steam Workshop download fails / mods not downloading on startup
If the server starts but Workshop mods do not appear to download, the Steam cache folder may be corrupted. To fix this:
- Stop the server in GPanel.
- Connect via SFTP and navigate to
/steamapps/workshop/. - Delete the entire
workshop/folder (or its contents). - Start the server again. Steam will re-download all Workshop items from scratch.
WorldDictionaryException / world dictionary corruption
If the Console log shows a WorldDictionaryException error, the world dictionary has become corrupted — this can happen when adding or removing mods that introduce new items or tiles.
WorldDictionary.bin can corrupt item IDs and vehicle IDs in your save. Only do this if the server will not start at all and you have no other option. Always back up your save folder first.
If you must attempt recovery:
- Stop the server in GPanel.
- Back up your entire save folder via SFTP or GPanel Backups.
- Connect via SFTP and navigate to
/.cache/saves/multiplayer/<YourWorldName>/. - Delete
WorldDictionary.bin. - Start the server. Project Zomboid will regenerate the dictionary on startup.
- Check in-game for corrupted items or vehicles. If the world is severely broken, restore from the backup you created in step 2.
Server crashes on startup with STACK TRACE in the console log
A stack trace immediately after starting usually indicates a mod conflict or a mod that is incompatible with your current build version. To diagnose:
- In GPanel, open the Console log and search for
STACK TRACE. - Read the lines above the trace for the mod filename or Mod ID mentioned — this is usually the problem mod.
- Remove that mod from both the
WorkshopItemsandModslines, save, and restart the server. - If the server starts cleanly after removal, check the mod's Workshop page for a B42-compatible update or a known conflict note in the comments.
You can also open the full debug.log file via SFTP at /.cache/Logs/<date>_DebugLog-server.txt for more detail than the GPanel console shows.
Server crashes when players with specific mods connect
If the server runs cleanly but crashes when a player joins, the player may have client-side mods that conflict with the server. Ask the player to disable all their local Project Zomboid mods from the in-game Mods menu and try connecting again. If the crash stops, the player should re-enable mods one at a time to find the conflicting mod.
Mod removed but server still tries to load it
If you removed a mod's ID from the configuration but the server still references it at startup, the Workshop item may still be cached. Delete the specific Workshop item folder from /steamapps/workshop/content/108600/<workshopID>/ via SFTP, then restart the server.
